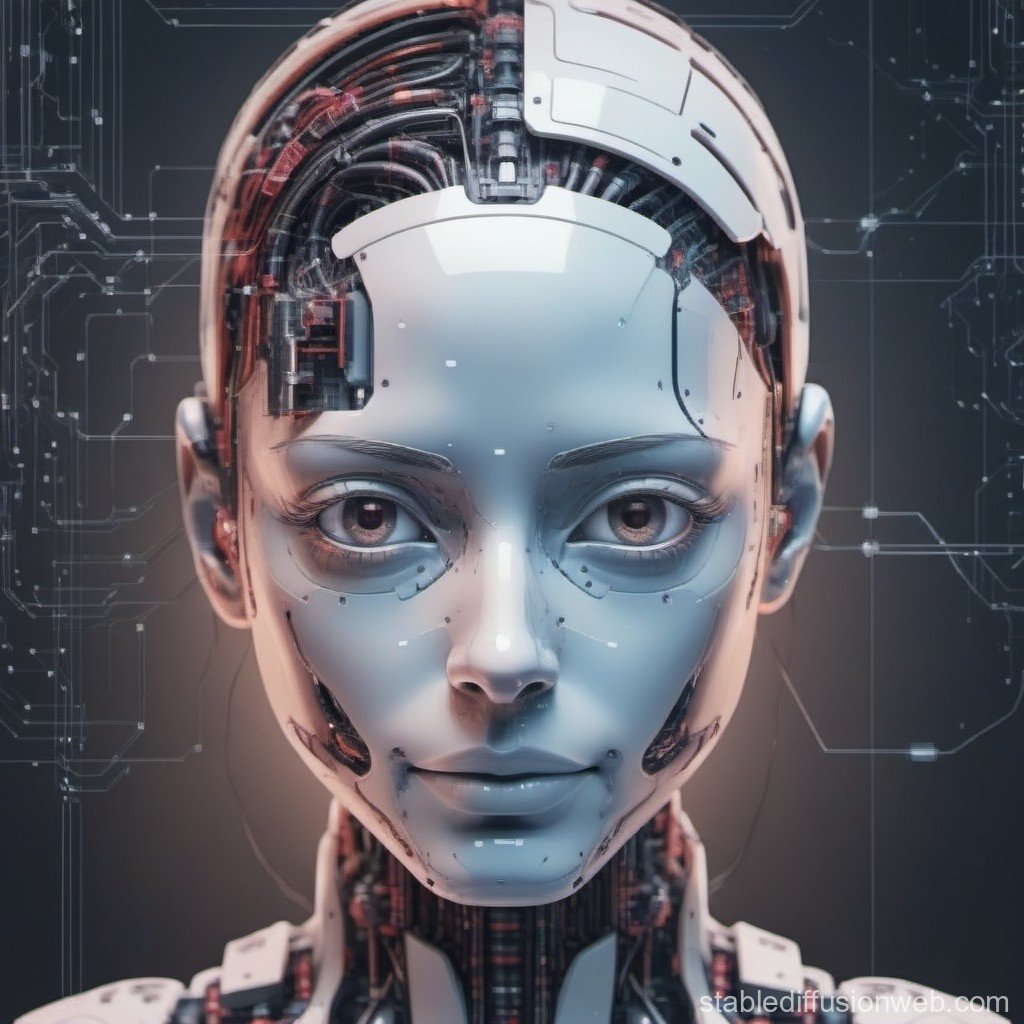
The digital world is buzzing with an artistic revolution, and you're invited. In 2024, the AI art market soared to an impressive $3.2 billion, with projections sky-rocketing to $40.4 billion by 2033. This isn't just a niche trend; it's a massive wave transforming how we create, imagine, and interact with visual content. You're here because you're curious, maybe a little intimidated, but ready to dive into Getting Started with AI Image Generation.
Imagine describing a scene in your mind – a sprawling fantasy city at sunset, a futuristic car speeding through neon-lit streets, or a whimsical creature perched on a mushroom – and having a sophisticated machine instantly bring it to life. That's the power of AI image generation. It's a creative superpower, now accessible to anyone willing to type a few words. This guide will cut through the jargon, demystify the process, and provide you with a clear roadmap to crafting your very first AI masterpieces.
At a Glance: Your Quick Start Guide to AI Images
- AI Art is Easy to Start: You don't need coding skills or a fine arts degree. If you can type, you can create.
- The "Prompt" is Key: It's your text description that tells the AI what to draw. Learn the simple formula.
- Hardware Matters (But Not Always): Powerful AI can run locally on your PC, or you can use convenient cloud services.
- Start with Beginner-Friendly Tools: Platforms like Fooocus or cloud options like Apatero make the initial leap effortless.
- Practice Makes Perfect (or at least better!): Expect to iterate and refine your descriptions for stunning results.
- It's Fast: Most images generate in 5-30 seconds, allowing for rapid experimentation.
The Magic Behind AI Art: How Machines Paint Dreams
At its core, AI image generation leverages sophisticated machine learning models. These models are essentially digital brains trained on millions of images – everything from classical paintings to modern photographs, architectural blueprints to fantastical illustrations. This massive dataset allows them to learn patterns, styles, objects, and concepts.
When you give the AI a "prompt" – a text description of what you want – it doesn't just search for a matching image. Instead, it uses its learned knowledge to generate an entirely new image from scratch, synthesizing elements and styles based on your input. Think of it like a highly skilled artist who's seen every artwork ever made and can now paint anything you describe, in any style you can imagine. And they do it in mere seconds! With 62% of marketing professionals already using AI for visual content, this technology is already reshaping how we produce creative assets at lightning speed.
Unlocking Creativity: The Universal Prompt Formula
The "prompt" is your instruction to the AI, and it's the most powerful lever you have. While you can type anything, a structured approach yields far better results. Most major AI platforms respond well to a universal prompt formula: Subject + Medium + Style + Lighting + Framing + Mood + Palette.
Let's break down each element with clear examples:
- Subject: This is the main focus of your image.
- Examples: "A majestic dragon," "a bustling city street," "a lone astronaut," "a bowl of ramen."
- Medium: Specifies the artistic form or material you want the AI to emulate.
- Examples: "Oil painting," "3D render," "Photography," "Watercolor sketch," "Digital illustration."
- Style: Dictates the artistic influence or genre.
- Examples: "Studio Ghibli style," "Art nouveau," "Cyberpunk," "Impressionistic," "Pop art."
- Lighting: Controls the atmosphere and how light interacts with your subject.
- Examples: "Golden hour lighting," "Dramatic rim lighting," "Soft diffused light," "Moonlit," "Neon glow."
- Framing: Determines the composition and how the subject is presented.
- Examples: "Portrait shot," "Wide shot," "Close-up," "Dutch angle," "Panoramic."
- Mood: Injects emotion and feeling into the image.
- Examples: "Dreamy mood," "Melancholic," "Energetic," "Mysterious," "Whimsical."
- Palette: Defines the dominant colors or color scheme.
- Examples: "Warm earth tones," "Muted pastels," "Vibrant neon colors," "Monochromatic," "Cool blues."
Putting It All Together: A Prompt Example
"A young woman, digital painting, Studio Ghibli style, golden hour lighting, portrait shot, dreamy mood, warm earth tones."
This level of detail significantly improves the AI's understanding and the quality of your output. It’s like giving a chef a specific recipe instead of just saying "make food."
Quick Reference: Style Keywords to Get You Started
- Photorealism: "photograph," "8K," "RAW photo," "hyperrealistic," "ultra-detailed"
- Illustration: "digital art," "illustration," "vector art," "concept art," "comic book style"
- Painting: "oil painting," "watercolor," "acrylic," "brushstrokes," "canvas texture," "masterpiece"
- 3D: "3D render," "Octane render," "Cinema 4D," "blender render," "voxel art"
- Anime: "anime style," "cel shaded," "manga art," "Japanese animation," "makoto shinkai style"
Choosing Your AI Canvas: Models and Tools Explained
The world of AI image generation is powered by various models and accessed through different software interfaces. Understanding the distinctions will help you pick the right starting point for your creative journey.
Understanding the AI Models: The Brains Behind the Art
Think of AI models as different artists, each with their own strengths, styles, and training.
- Stable Diffusion XL (SDXL): This is often the best choice for beginners running locally. It's incredibly versatile, excels across many styles, and has a massive, supportive community. SDXL runs comfortably on GPUs with at least 8GB of VRAM. It's a fantastic foundation for learning.
- Midjourney: Exceptionally beginner-friendly, Midjourney is renowned for its stunning artistic quality, especially in concept art and illustration. If you prioritize beautiful aesthetics right out of the box and don't mind a subscription, Midjourney is a powerhouse.
- DALL-E 3: Another beginner-friendly option, DALL-E 3 shines with excellent prompt understanding and integrates seamlessly with ChatGPT. It’s perfect for quick generations and those who prefer a straightforward, conversational approach to prompting.
- FLUX: Offering higher quality, better detail, and more accurate prompt following, FLUX is a step up for those who’ve mastered the fundamentals. It requires more robust hardware (minimum 12GB VRAM, 16GB+ recommended) but delivers superior results for complex projects.
Choosing Your Workbench: Software Interfaces
Once you pick an AI model, you need a way to interact with it. These are the "tools" or interfaces.
- Fooocus: The true beginner's choice for local generation. Fooocus simplifies the entire process, offering an intuitive, minimal interface with intelligent defaults, especially for SDXL. If you're running locally, this is your easiest entry point.
- Forge: A highly optimized version of Automatic1111, Forge is known for its speed and memory efficiency, supporting both SDXL and FLUX. It maintains a more traditional interface, making it a great option for those looking for performance without a steep learning curve.
- Automatic1111: This is the established standard with the largest community and extension ecosystem. While its generation speed can be slower than newer alternatives like Forge, its vast array of features and community support make it a powerful choice for those ready to dive deep.
- ComfyUI: This is for the power users seeking maximum control. ComfyUI uses a node-based interface that visually maps out your data flow. It has a steep learning curve but offers unparalleled customization, often used internally by companies like StabilityAI.
Cloud-Based Alternatives: No Hardware, No Problem
Don't have a beast of a gaming PC? No worries! Cloud-based platforms offer an excellent alternative, giving you instant access to powerful AI models without needing to buy or configure expensive hardware.
- Apatero.com: A great example, Apatero provides easy, browser-based access to premium models like FLUX, SDXL, and others. It's perfect for users who prioritize convenience or don't have suitable local hardware. Beyond text-to-image, many cloud platforms also offer image-to-image, text-to-video, image-to-video, and even custom LoRA creation. This is often the quickest way to get started and experiment with advanced features like our AI Generation Tool.
Your Hardware: The Creative Engine
If you plan to run AI image generation software directly on your computer, your hardware configuration, particularly your Graphics Processing Unit (GPU), plays a critical role.
GPU VRAM: The Most Important Factor
VRAM (Video RAM) is specialized memory on your graphics card that the AI model uses to process images. More VRAM means you can generate larger images, run more complex models, or use advanced features. NVIDIA GPUs on Windows are generally preferred due to excellent CUDA optimization and straightforward installation.
- 8GB VRAM: This is your entry-level for local AI. You can comfortably run SDXL at standard resolutions (up to 1024x1024). FLUX is technically possible but will be very limited in its capabilities.
- 12GB VRAM: Offers a comfortable experience for SDXL, allowing you to use more advanced techniques like LoRAs (more on these later) and ControlNet without hitting memory limits. FLUX also becomes viable at standard resolutions here.
- 16GB+ VRAM: Provides full flexibility for both SDXL and FLUX. You can generate larger images, experiment with more complex workflows, and generally push the boundaries of what local generation can do.
- 24GB VRAM (e.g., RTX 3090, 4090): This is production capability. If you're serious about high-resolution output, AI video generation, or running multiple models simultaneously, this is the sweet spot.
System RAM & Storage
While VRAM is king, your system's main memory (RAM) and storage also matter.
- System RAM: 16GB is sufficient for basic workflows. 32GB provides comfortable headroom for advanced techniques and prevents bottlenecks.
- Storage: AI models themselves can be large (6GB+ each), and you'll accumulate many images. NVMe SSDs are highly recommended for faster model loading and overall system responsiveness. Ensure you have ample free space – 50GB minimum is a good starting point, but you'll likely need more.
Demystifying AI Art Jargon: Essential Terminology
Like any specialized field, AI image generation comes with its own vocabulary. Don't worry, these aren't complex; they're just specific labels for key components.
- Checkpoint Model: This is the core "brain" of your AI, a large file (often 6-10GB or more) that contains all the learned knowledge. It defines the AI's fundamental capabilities and its base aesthetic style. You'll download these for local use.
- Prompt: As we discussed, this is your text description that guides the AI in creating the image. It's the "what to draw."
- Negative Prompt: Just as important as the positive prompt, this tells the AI what to avoid. For example, a negative prompt like "blurry, distorted hands, bad anatomy, grayscale" can dramatically improve image quality and fix common AI quirks.
- Sampler: This is the algorithm that takes the initial random noise and gradually refines it into a coherent image. Different samplers affect the image's quality, detail, and the speed of generation. Common ones include DPM++ 2M Karras or Euler a. Often, 20-30 sampling steps are enough to get great results.
- VAE (Variational Autoencoder): This component handles the final conversion of the AI's internal representation into a visible pixel image. It influences color accuracy, contrast, and can help prevent subtle artifacts. Many models come with a default VAE, but sometimes a separate one can be downloaded for better results.
- LoRA (Low-Rank Adaptations): Pronounced "LOR-uh," these are small files (10-200MB) that fine-tune a checkpoint model for a very specific concept, style, or subject. For instance, a LoRA might teach the AI to draw a particular character, a unique art style, or a specific type of clothing. They're incredibly powerful for adding consistency but consume additional VRAM.
- ControlNet: This is an advanced technique that provides precise compositional control over your AI images. You feed it a reference input, like a pose skeleton (to dictate a character's stance), an edge map (to match a specific outline), or a depth map. ControlNet ensures the AI adheres to this structural guidance, but it significantly increases VRAM requirements during generation.
Your First AI Image: A Step-by-Step Walkthrough with Fooocus
For local generation, Fooocus is undoubtedly the easiest way to start. Let's get you generating!
1. Verify Your Hardware
Before you begin, ensure your system meets the minimum requirements for Fooocus:
- NVIDIA GPU with at least 8GB VRAM.
- 16GB System RAM.
- At least 50GB free storage space (ideally on an NVMe SSD).
2. Download & Install Fooocus
- Go to the official Fooocus GitHub page (a quick search for "Fooocus GitHub" will find it).
- Look for the "releases" section and download the latest version, usually named something like
Fooocus_win64_X.Y.Z.7z. - Extract the contents of the
.7zfile to a folder on your hard drive. Choose a location with plenty of space, and avoid spaces or special characters in the folder path (e.g.,C:\Fooocusis good,C:\My AI Stuff\Fooocusis bad).
3. First Launch & Model Download
- Navigate to your Fooocus folder and double-click
run.bat. - A command window will open. Fooocus will automatically begin downloading the default SDXL checkpoint model. This is a large file (around 6GB+), so it could take 10-30 minutes depending on your internet speed. Be patient!
- Once downloaded, Fooocus will launch a browser window, presenting its clean, minimalist interface.
4. Write Your First Prompt
In the main text box, type a simple yet specific prompt. Let's try:
"A golden retriever puppy playing in autumn leaves, sunlight filtering through trees, photorealistic, high quality."
5. Generate & Review
- Click the "Generate" button.
- The command window will show progress, and in your browser, you'll see a placeholder for the image. Generation typically takes 15-60 seconds depending on your GPU.
- Fooocus generates multiple variations by default, allowing you to pick your favorite.
6. Iterate & Improve
- Analyze the results: Did the AI understand your prompt? Are there any unexpected elements?
- Adjust your prompt: If you want more detail, add it. "Add vibrant orange and red leaves," "add a small squirrel in the background."
- Introduce Negative Prompts: If you see common AI artifacts (e.g., blurry textures, weird eyes), click the "Advanced" button to reveal the "Negative Prompt" box. Add something like: "blurry, distorted, bad anatomy, watermark, ugly, poor quality."
- Experiment: Change one element at a time (e.g., change "photorealistic" to "digital painting") to see how it alters the output.
7. Save Your Favorites
- Once you have an image you love, right-click on it in the browser and select "Save image as..." to save it to your computer.
Congratulations! You've just created your first AI image. This iterative process of prompting, generating, and refining is the heart of AI art.
Common Beginner Mistakes (and How to Avoid Them)
Everyone makes mistakes when starting out. Knowing these pitfalls will save you a lot of frustration.
- Vague Prompts: The AI isn't a mind-reader. "A dog" will give you a generic dog. "A cute fluffy shiba inu puppy wearing a tiny wizard hat, sitting in a field of sunflowers, dappled sunlight, whimsical illustration, vibrant colors" will give you something far more specific and delightful.
- Solution: Always use the universal prompt formula as a checklist: Subject + Medium + Style + Lighting + Framing + Mood + Palette.
- Ignoring Negative Prompts: Many beginners skip negative prompts, then wonder why their images have odd artifacts.
- Solution: Always include a general negative prompt, then add specific terms as issues arise (e.g., "extra limbs," "mutated hands," "text," "signature").
- Expecting Perfect Results Immediately: AI generation involves a degree of randomness. Your first few images might not be exactly what you envisioned.
- Solution: Generate multiple images. Don't be afraid to click "Generate" ten times with the same prompt. Often, one or two will stand out.
- Overwhelming Yourself with Options: Tools like Automatic1111 or ComfyUI have hundreds of settings. Trying to understand them all at once is a recipe for burnout.
- Solution: Start with simplified tools like Fooocus or cloud services. When you move to more complex tools, begin with default settings and change only one parameter at a time.
- Comparing Unfairly to Professionals: The stunning AI art you see online often comes from artists with months or years of experience and specialized workflows.
- Solution: Focus on your personal progress and the joy of creation. Celebrate small victories and learn incrementally.
- Not Understanding Parameters: The various sliders and checkboxes aren't just for show.
- Solution: Pay attention to what Seed Values, Steps, and CFG Scale do.
- Seed Values: A random number that determines the initial noise pattern. Keeping the seed constant with the same prompt allows you to reproduce (or slightly tweak) a specific image. It's your "undo" button for good results.
- Steps (Sampling Steps): More steps (up to 30-50) generally add more detail and refinement to the image, but also increase generation time. Start with 20-30 steps for testing.
- CFG Scale (Classifier-Free Guidance Scale): This controls how closely the AI follows your prompt versus using its own creativity. A sweet spot is often 4-7. Values above 12+ can lead to over-saturated, artificial, or "overcooked" results.
Your Action Plan: Beyond Your First Image
You've taken the first exciting step. Now, how do you keep growing your skills?
- Re-Assess Your Hardware: If you started with cloud services, consider your future needs. Does your local setup need an upgrade to handle more complex models like FLUX or tools like Forge?
- Generate, Generate, Generate: The best way to learn is by doing. Aim to generate at least 10-20 images daily with varying prompts. Don't be afraid to experiment wildly.
- Practice Prompt Specificity: Continuously refine your prompts. Start simple, then add more detail using the universal formula. Try to evoke specific moods or unique styles.
- Master Negative Prompts: Make negative prompts a natural part of your workflow. Observe common flaws in your generations and add them to your negative prompt list. You might even create a standard negative prompt template to use every time.
- Explore Image-to-Image (Img2Img): Many tools (including Fooocus and cloud services like Apatero) allow you to use an existing image as a starting point. This is incredibly powerful for transforming photos, sketching ideas, or applying new styles to existing visuals.
- Dive into LoRAs: Once you're comfortable with basic prompting, look into LoRAs. They can dramatically expand the capabilities of your base models, allowing you to create images with specific aesthetics or characters. Just remember they consume additional VRAM.
- Join the Community: The AI art community is vibrant and collaborative. Platforms like Reddit, Discord, and various forums are filled with users sharing prompts, tips, and inspiration. Learn from others, share your work, and ask questions. Many users readily share their prompts, making it easy to reverse-engineer stunning images. For instance, you can find a wealth of community insights on various AI image generators and their nuances.
- Understand Licensing and Ethics: As you create more, consider the ethical implications of AI art. Some models are trained on copyrighted data. If you intend to use your AI art commercially, always research the licensing terms of the model and any LoRAs you use.
- Consider Advanced Tools: If you hit the limits of Fooocus and crave more control, consider transitioning to Forge for performance or Automatic1111 for its vast ecosystem. When you're ready for truly granular control over the data flow, ComfyUI awaits. For those ready to explore the intersection of AI with other creative workflows, AI tools for artists offer a comprehensive suite of options.
- Build a Reference Library: Save your favorite images and their corresponding prompts. This becomes a valuable personal library of what works for you, allowing you to quickly replicate or adapt successful styles and compositions. It's an excellent way to refine your artistic "voice" within the AI realm, just as you might curate a collection of inspiring images for other creative projects. You can even explore different AI art styles to broaden your horizons.
The Future is Visual, and You're Creating It
Getting started with AI image generation is less about mastering complex software and more about cultivating a new way of thinking creatively. It's about learning to articulate your imagination in a language the AI understands, then iterating on those ideas with rapid feedback.
Whether you're looking to create stunning visual content for marketing, personalize your social media, bring your personal stories to life, or simply explore the frontiers of digital art, the tools and knowledge are now at your fingertips. The average generation time is a mere 5-30 seconds, meaning your creativity is no longer bound by the speed of your hand, but by the swiftness of your imagination.
Embrace the experimentation, enjoy the process, and watch as your words transform into breathtaking visuals. The journey into AI art is just beginning, and you're now equipped to be a part of it.